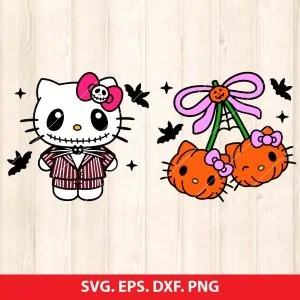
To make an SVG file for Cricut, you can follow these steps:
- Choose a software: There are many software options available for creating SVG files, including Adobe Illustrator, Inkscape, Sketch, and Figma. You can choose the one you are most comfortable with.
- Set the document size: Set the document size to match the size of the material you will be cutting with the Cricut machine.
- Create your design: Create your design in the software, making sure to use vector shapes and lines as opposed to raster images.
- Group and Ungroup objects: Once you have your design, group objects that belong together and ungroup objects that are separate.
- Save your file: Save your file in the SVG file format. Be sure to save the file in a location that you can easily access.
- Upload to Cricut Design Space: Upload your SVG file to Cricut Design Space. Once uploaded, you can adjust the size, position, and orientation of the design before sending it to be cut on your Cricut machine.
It is also important to note that the Cricut machine has specific requirements for SVG files. To ensure your design will cut correctly, make sure to follow the guidelines provided by Cricut for creating SVG files or buy ready-made SVG files. Visit our shop to view SVG files available
At Brings.lv we offer more than 10 000 different premium-quality SVG files for your Cricut, Silhouette Cameo, and Scan’n’Cut projects. we have filed for different occasions and events, files with game and movie characters, popular quotes, and designs. All our files are made accordingly to Cricut guidelines and are tested on Cricut before being sold.
Newest SVG files in our store
-
 Hello Kitty Halloween SVG, Pumpkin Hello Kitty SVG, Kawaii Halloween, Cute Kitty SVG, Kids Halloween Shirt DesignUSD 3.50
 -
 Hello Kitty Halloween SVG, Sanrio Halloween SVG, Kawaii Spooky SVG, Cute Halloween Cut Files, Hello Kitty Witch SVG, Pumpkin Kitty SVG, Boo Hello Kitty, Halloween Cricut BundleUSD 4.50
 -
 Palm Tree SVG, Tropical SVG, Beach SVG, Summer Cut File, Hawaii Design, Vacation SVG, Coconut Tree SVG, Silhouette Cameo File, Cricut Tropical DesignUSD 2.50
 -
 Labubu SVG, Kasing Lung SVG, Cute Monster SVG, Cricut Cut File, Silhouette Cameo, DIY Sticker Design, Kawaii Monster SVG, Printable Labubu, Vinyl Decal SVGUSD 3.50
 -
 Stitch With Sunflower SVG, Stitch SVG, Lilo & Stitch SVG, Sunflower SVG, Cute Stitch Design, SVG for Cricut, Silhouette Cut FileUSD 3.50
 -
 Labubu Dodgers SVG, Los Angeles Dodgers SVG, Kawaii Baseball SVG, Dodgers Fan Art, Labubu Sports SVGUSD 2.00
 -
 Birth Month Flower SVG, Floral SVG Bundle, Birthday Flower SVG, Monthly Flower Designs, Personalized Gift SVG, Cricut Flower Cut FilesUSD 2.50
 -
 Hello Kitty Halloween SVG, Hello Kitty Jack Skellington SVG, Hello Kitty Pumpkin SVG, Hello Kitty Witch SVG, Spooky KittyUSD 2.50
 -
 Hello Kitty Jack Skellington SVG, Nightmare Before Christmas SVG, Kawaii Halloween SVG, Cute Spooky SVG, Halloween Hello Kitty, Jack Skellington PNG, DIY Halloween ShirtUSD 2.00
 -
 Labubu Hello Kitty SVG, Labubu x Hello Kitty, Kawaii SVG, Cute Character SVG, Hello Kitty Fan Art, Vinyl Decal Design, Cricut Cut File, Silhouette CameoUSD 3.50
| ReplyForward |