Making shirts with Cricut Iron-On Vinyl is a fun and easy project that you can do with SVG files, Vinyl, and your Cricut machine.
Take a look at amazing SVG files for your T-shirts
Here are the steps to create your own iron-on vinyl shirt:
Materials needed:
- Cricut machine
- Iron-on vinyl
- Weeding tool
- Scissors
- Iron or EasyPress
- T-shirt or other fabric items to apply vinyl onto

Steps:
1# Design your image or text on Cricut Design Space.
You can either use one of the pre-made SVG files for design or to create your own. Make sure to mirror your design before cutting.
2# Load your iron-on vinyl into your Cricut
Load the SVG file to your Cricut machine and follow the prompts on the screen to cut your design.
3# Cut your design and remove vinyl around your design
Once your design is cut, use the weeding tool to remove any excess vinyl from around the design.
#4 Preheat your iron or EasyPress
Preheat your iron or EasyPress to the recommended temperature for your iron-on vinyl and fabric. Check the instructions that come with your vinyl for the recommended settings.
#5 Position your design
Position your design on your shirt or fabric item. You can use a ruler or measuring tape to make sure it’s straight.
#6 Protect your design
Place a piece of parchment paper or Teflon sheet on top of your design and press with your iron or EasyPress for the recommended amount of time. Check the instructions that come with your vinyl for the recommended time and pressure.
#7 Let it cool
Once you have pressed your design, allow it to cool for a few seconds before peeling off the plastic backing.
Your shirt with Cricut Iron-On Vinyl is now complete! Enjoy wearing your new creation.
Note: Always refer to the instructions that come with your specific type of iron-on vinyl for the best results.
Take a look at the newest SVG files for your T-shirts
-
Product on sale
 Bichota SVG, Karol G SVG, Latin Music SVG, Reggaeton SVG, Cricut Cut File, Silhouette Cameo Design, T-Shirt Design SVG, Bichota Clipart
USD 2.00USD 1.00 -
Product on sale
 Ain’t No Family Like the One I Got SVG, Family SVG, Unique Family Quote, Custom Family Shirt Design, SVG for Cricut, Silhouette Cameo, Family Reunion SVG
USD 2.00USD 1.00 -
Product on sale
 Hennessy SVG, Cut File for Cricut, Silhouette Cameo File, Henny SVG, Branded Merchandise, Tumbler Design SVG, Party SVG, Hip-Hop Culture SVG
USD 4.50USD 2.25 -
Product on sale
 Halloween Hello Kitty SVG, Pumpkin Hello Kitty SVG, Kawaii Halloween, Cute Kitty SVG, Kids Halloween Shirt Design
USD 3.50USD 1.75 -
Product on sale
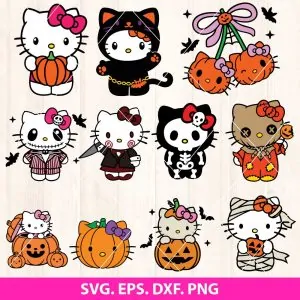 Hello Kitty Halloween SVG, Sanrio Halloween SVG, Kawaii Spooky SVG, Cute Halloween Cut Files, Hello Kitty Witch SVG, Pumpkin Kitty SVG, Boo Hello Kitty, Halloween Cricut Bundle
USD 4.50USD 2.25


